We’ve sewn up a few shower curtains over the years and thought you might enjoy a tutorial so you can sew your own!
Shower curtains are easy to switch out and they're usually the main decor in the bathroom. Why not have a few on hand to change up your decor (in one of the most-used rooms in the house) every season!
For this tutorial we're using our eco-certified, hand-screenprinted fabrics. It's important to use a quality fabric for your shower curtain that can withstand wear. The hemp properties in our fabrics make for a curtain that can withstand humidity, tugging and pulling.
A standard shower curtain has the finished size of approx. 72 x 72 inches with 12 holes for the rings.
Because most fabrics are 45 - 57 inches wide, you'll need to sew two panels of fabric together to achieve that 72 inch width.
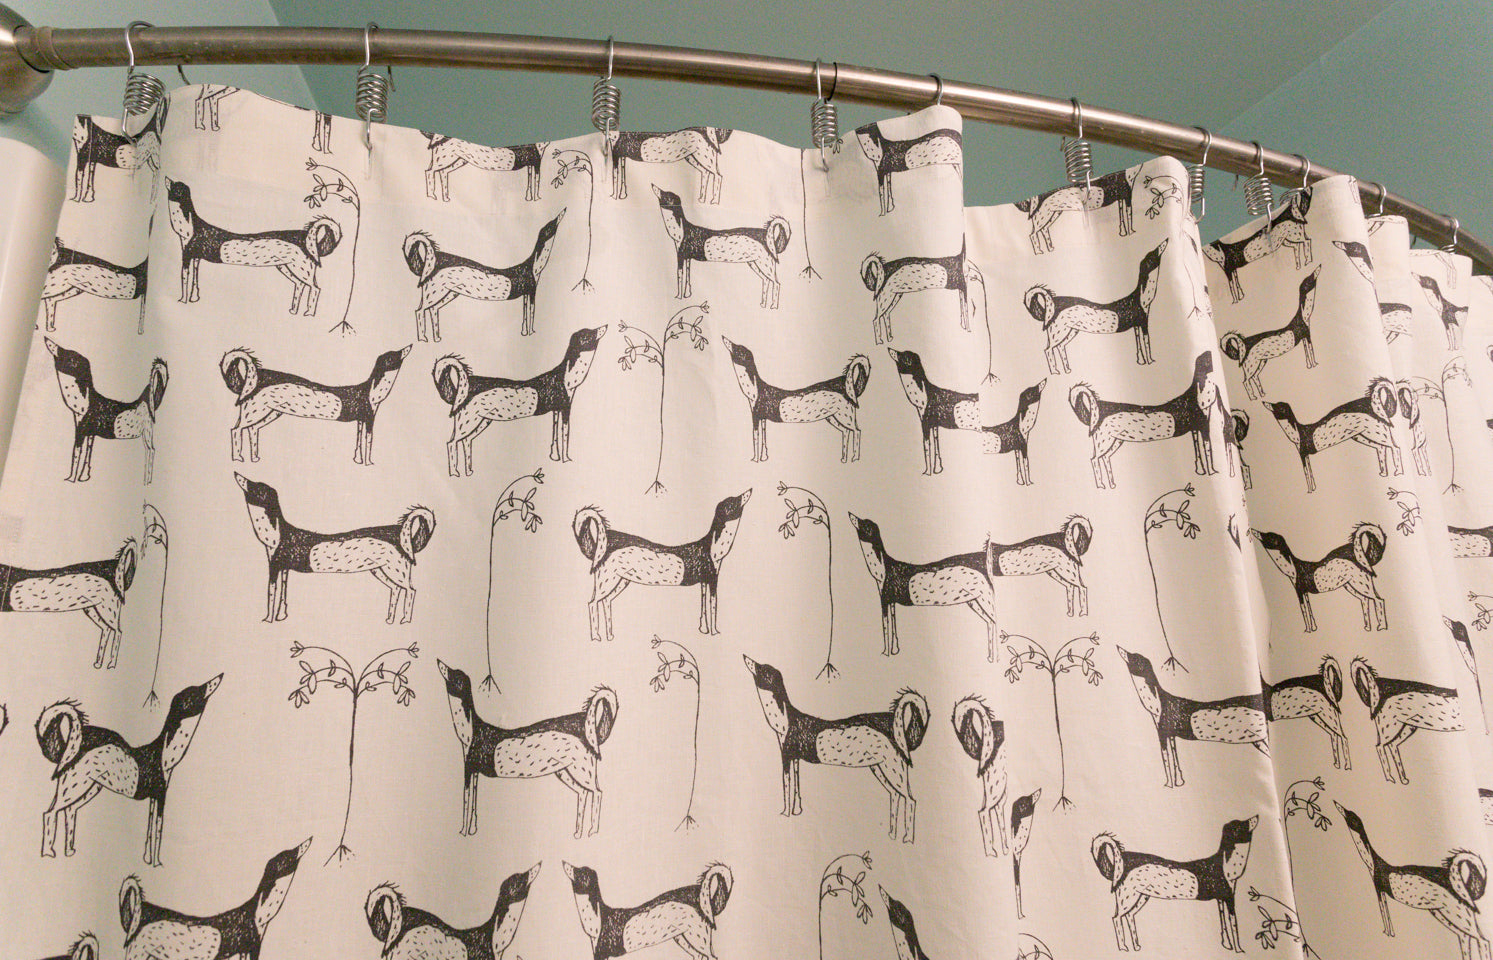
If you're using our fabrics, pay attention to the horizontal repeat. Some of our patterns repeat on the horizontal, but some do not. You can find this information in the product listing.
The horizontal repeat will tell you if the fabric can be pattern-matched, making a continuous repeat. Sewing repeats together where they match is very pleasing to the eye and will make your shower curtain look extremely professional. But it's also not necessary - it's up to you! Here are a few examples:

Our Dog print repeats every 45 inches. This is where the pattern starts over again.

Storybook does not repeat horizontally, so you wouldn't be able to pattern-match this repeat on the horizontal. This isn't a bad thing - it just means you don't need to worry with pattern-matching. When the two panels are sewn together, you'll have an all-over pattern.
If you need help determining which of our prints can be pattern matched on the horizontal, please don't hesitate to get in touch - I'm happy to help! My email is hello@saraparkertextiles.com.
Another option I want to mention is piecing together various panels or remnants to make one large curtain. Nothing says you have to pattern match or use only one fabric. Get creative and use what you have on hand! Your bathroom will be uniquely yours. Here's an example of what a patchwork shower curtain would look like: 
Now, on to the tutorial:
SUPPLIES
4.5 yards of fabric (162 inches), cut into two panels - 81 inches tall x the fabric width
Button hole foot for your sewing machine.
note: seam allowances are 1/2 inch
Step 1. Cut fabric.
If you’re working with continuous yardage, cut in half so you have two separate panels measuring 81 inches tall. If you’re piecing together one large panel, I recommend a pre-hemmed size of 81 x 81 inches so you'll have room for hemming, button holes, and squaring off. (Keep in mind you will see the pieced seams while you're taking a shower, so make them pretty by serging or using a zigzag stitch.)

Step 2. Determine if you want to pattern match your two panels. Here’s a trick we used on our Dog print. (Remember this is up to you! Head on to Step 3 if you're not pattern matching.)

- Finish the cut edge of Panel A by serging, zigzag stitching, or finishing with bias tape.
- Press finished edge of Panel A by 1/2 inch with wrong sides facing.
- Lay Panel A on top of Panel B and line up pressed edge of Panel A to match pattern as closely as possible to Panel B.


- On Panel B, use a pencil or fabric marking tool to make marks where the two fabrics should align. Use the marks you made on Panel B as a fold line, and press along this line, wrong sides together.
- Open up both ironed edges on Panel A and B, and using your crease mark as a guide, pin fabric together. Your iron lines are now your seam lines. Sew along the line, removing pins as you sew.
- Trim seam on Panel B to 1/2 inch and serge, zigzag stitch, or finish with binding. Press the seam open.

Step 3. Cut width to size and hem.
If you aren't pattern-matching your two fabric panels, sew them together where you see fit. Finish the seam and press open. Measure from the center hem to 37 inches out on both sides. Make marks at the 37 inch and trim using a rotary cutter or scissors, being careful to cut square. Your shower curtain is now 74 inches wide, with a seam running down the center.
Make a 1/2 inch hem on both sides by turning fabric to the wrong side by 1/2 inch, press, and turning again 1/2 inch, press - sew hems and press.
Your finished width should be 72 inches.
Step 4. Cut length to size and hem.
Start with the bottom of the shower curtain. Square off using a rotary cutter or scissors. Make a 1 inch hem by turning fabric to the wrong side by 1 inch, press, and turning again 1 inch, press - sew hem and press.
Measure from the bottom of the shower curtain to the top - should be approximately 76" to allow for a 2" hem on top.
Cut the top square using a rotary cutter or scissors. Make a 2 inch hem by turning fabric to the wrong side by 2 inches, press, and turning again 2 inches, press - sew hems and press.
Your finished length should be 72 inches.

Step 7. Create button holes for rings.
On the top of the shower curtain, measure 1.25 inches in from each side of the curtain and make a 1.5 inch mark, perpendicular to the top hem. These will be your starting and ending button holes. Measure and mark every 6.25” to fill in the other 10 button holes.

Follow your machine's directions to sew button holes. Always practice on a scrap piece of fabric before going to your almost-finished shower curtain.
Using an Xacto knife or a chisel, open up your button holes. Check out this post from Helen's Closet for more details on button holes.
That's it! Enjoy your new shower curtain! And don’t forget to share what you make using #SaraParkerTextiles.


Comments (0)
Back to SP Blog